A strong password is recommended to protect your Apple account. It shouldn’t be so easy that anyone can guess and access your Apple account.
But the account protection can sometimes go wrong. If you forget the password, you won’t be able to access many of the Apple services on your iOS device.
An Apple ID password is required to access Apple Music, Apple Store, iTunes Store, iCloud, Apple TV, and other services. The Apple ID (an email address) and password are used across Apple services, including making payments for purchases, downloads, etc.
Here we will share in detail how to recover Apple ID password and access your Apple services again.
You can apply these methods on series of iPhone 14, 13, 12, 11, X Max, XS, X, 8, 8 plus, 7, and below. You can also use these solutions to recover Apple ID password on iPad and iPod touch as well.
How to recover forgotten Apple ID and Password
The only solution to recover forgotten Apple ID password is to reset your account password. There are various ways with which you can change the Apple account password.
You can reset Apple ID password on your iPhone, iPad, iPod touch, Mac, and even on someone else iOS device, when your own iPhone isn’t accessible or fails to change the password.
Further, Apple offers utilities like Find My iPhone, Apple Support app, and online provision if you forget your Apple ID password.
Methods to reset Apple ID password and regain access to your account.
- Reset your password on iPhone Settings
- Reset Password on your Mac
- Use Apple Support app on someone else iPhone
- Use Find My iPhone app
- Change Apple ID password through the web browser
- Reset password for two-step verification Apple account
Also read: Forgot iPhone passcode? Here’s how to get into a locked iPhone.
Method 1: Reset your password on iPhone Settings
Follow the below steps on your iPhone, iPad, or iPod touch to reset your password:
- Go to iPhone Settings.
- Click on your <name> > Password & Security > Change Password.
 Figure: Change Password option on iPhone
- Enter your iPhone passcode.
- Tap Done.
- Enter your new password twice in the New and Verify fields.
- Tap Change.
Method 2: Reset Password on your Mac
Follow the below steps on your Mac system to reset Apple ID password:
- Choose Apple menu > System Preferences.
- Click Apple ID.
- Click Password & Security.
- If asked to enter Apple ID password, click Forgot Apple ID or password.
- Click Change Password.
- Enter your Mac password, when prompted.
- Click Allow.
- Enter your new password. Again enter the new password under Verify.
- Click Change.
Method 3: Use Apple Support app on someone else iPhone
You can also use the Apple Support app on a friend’s iOS device to reset the password of your iPhone and iPad. This method is helpful when you’re unable to access or change the password on your own iPhone.But make sure your friend is using iOS 12 or above.
Download the Apple Support app on your friend’s iOS device.Next, follow the below steps to reset your device password through a friend’s iPhone:
- Launch the app on your friend’s iPhone or iPad.
- Under Topics, select Passwords & Security.
- Click Reset Apple ID password.
- Click to follow Get Started > A different Apple ID.
- Enter your Apple ID for which you want to reset the password.
- Tap Next. Follow the on-screen steps, until you receive a message that your Apple ID password is changed.
Method 4: Use Find My iPhone app
If the alternative iPhone has iOS 9, iOS 10 or iOS 11, then use ‘Find My iPhone’ app to reset your Apple password.
Borrow a friend’s or family member’s iPhone and follow the below steps to reset your iPhone’s Apple password:
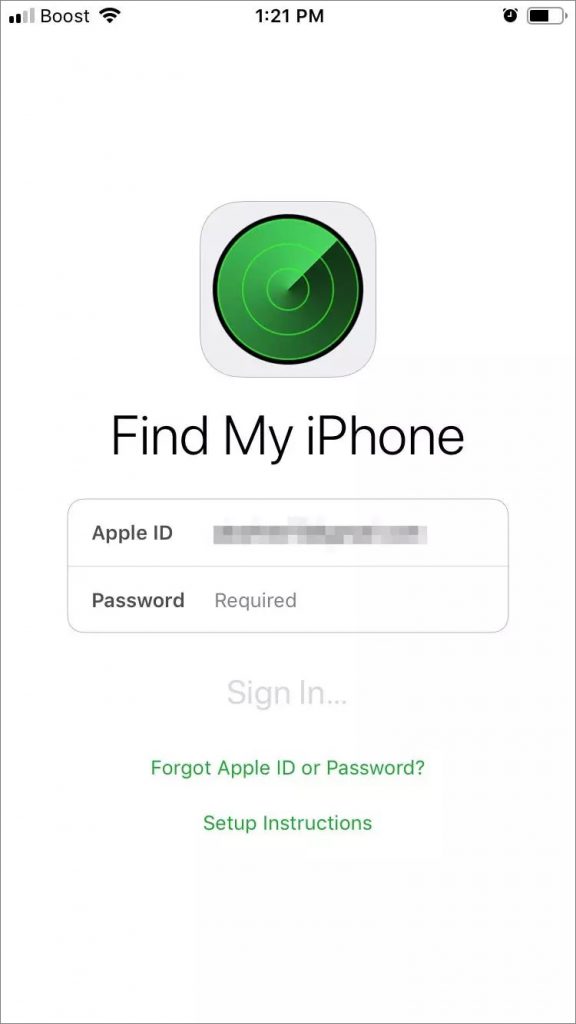
- Open ‘Find My iPhone’ or ‘Find My’ app on a different iPhone.
- The Sign In screen appears. Erase if you see any user name in the Apple ID box.
 Figure: ‘Find My iPhone’ app screen
- Click Forgot Apple ID or Password.
- Enter the device passcode.
- Enter your new password. Enter it again to verify.
- Select Next and follow the prompts to receive confirmation of the password change.
Method 5: Change your Apple ID password through the browser
Another way to reset forgotten Apple ID and password is through your iCloud account.
Follow the steps to recover Apple ID and password:
- Open Apple account page in a browser.
- Enter your Apple ID email.
- Click Forgot Apple ID or password.
- Enter Apple ID again and choose Continue.
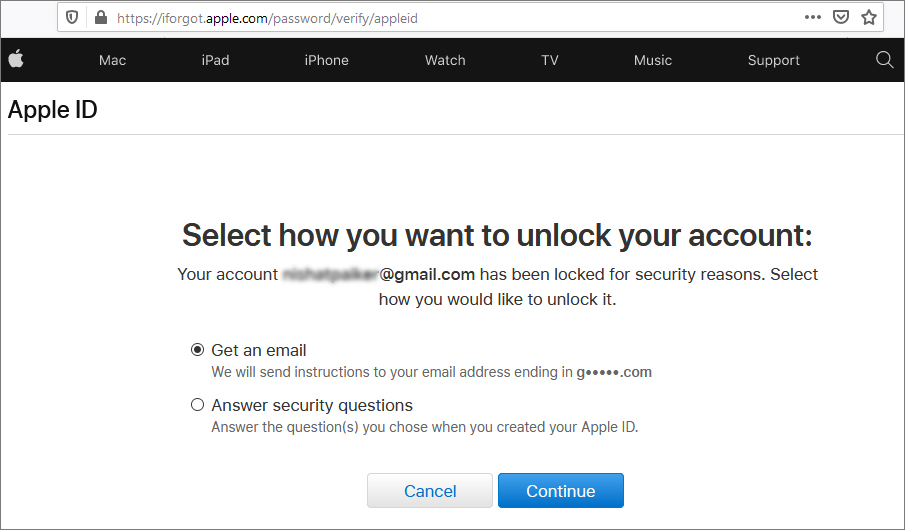
- Choose how to reset your password:
 Figure: Options to recover Apple password via browser
- You can select Get an email to reset your password. An email will be sent with steps to reset Apple password.
- If you have an account with security questions set up, you can select Answer security questions and follow the on-screen instructions.
Once you reset the password, you will be asked to sign in again using the new password.
Method 6: Reset password for Apple’s two-step verification account
In case your Apple account has two-step verification, follow the below steps to recover forgotten Apple ID password:
- Open Apple account page in a browser.
- Enter your Apple ID email.
- Click Forgot Apple ID or password.
- Enter Apple ID again and choose Continue.
- Enter the Recovery Key that you received at the time of two-step verification to secure your Apple ID.
- Click Continue.
 Figure: Recovery Key option for two-step verification
- Next, choose a trusted device, when asked. You will receive a verification code on your device. Enter the verification code.
- Create a new password, then select Reset Password.
- After you reset password, you’ll be asked to sign in again with your new password.
Note: In case you have lost your Recovery Key or access to the trusted device, you cannot change the Apple password.
How to recover lost data when you forget your Apple ID password?
Are you worried about losing the inaccessible data on your iPhone due to forgotten password? It’s recommended to use an iPhone data recovery tool — Stellar Data Recovery for iPhone to retrieve lost data, if you are not able to reset the forgotten Apple account password.
The software helps you to easily recover and save Camera Roll, Photo Stream, Notes, Contacts, Voice Memo, Reminder, Messages, Facetime, Safari Bookmarks, WeChat, Line, Kik, WhatsApp, WhatsApp Attachments, Viber, Tango, Apps Library, etc.
Steps to recover lost iPhone data:
- Download Stellar Data Recovery for iPhone on your PC or Mac.
- Connect your iPhone with the computer.
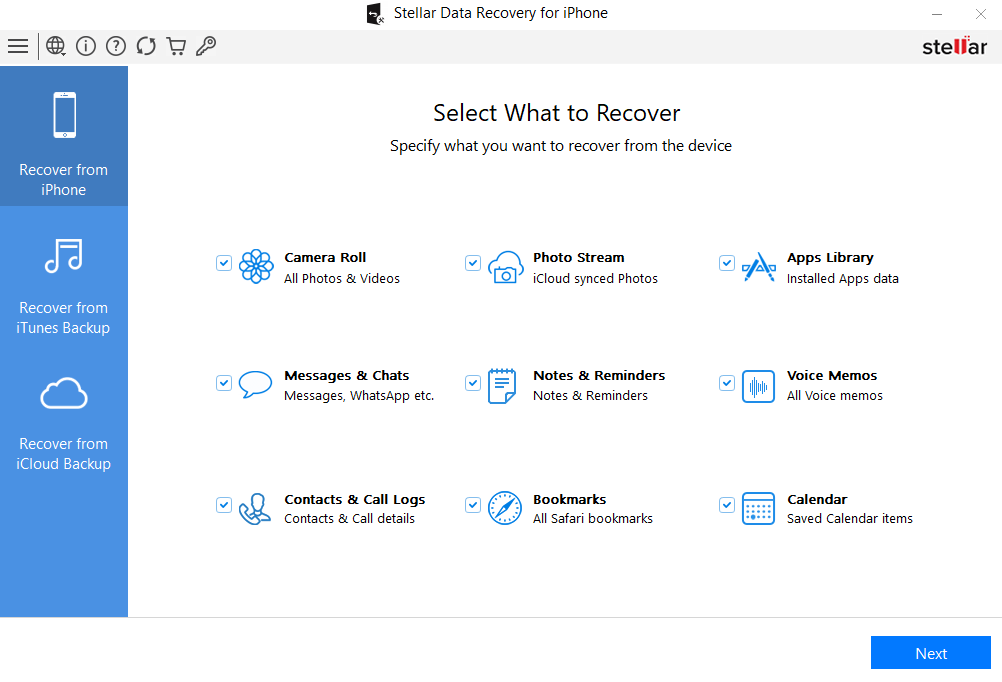
- Launch the software. On the main screen, select Recover from iPhone.
 Figure: Recover from iPhone options
- Choose the type of data that you want to restore and click Next.
- The application scans the device. Preview the found data and lets you save it at a desired location on your computer.


Conclusion
When you forget your Apple ID password, it restricts a lot of your activities on the iPhone. You lose access to iTunes Store, iCloud, Apple Store, iMessage, Apple Music, Apple TV+, third-party apps, etc. Moreover, you cannot make payments or download music.
However, with the methods given here, you can reset the account password and enjoy various Apple services again. To recover the forgotten Apple ID password, use yours’ or a friend’s iOS device. Get apps like Apple Support, Find My iPhone, or visit online Apple ID page to change the account password.
Hope you found this post helpful. Do share in the comments section below how you were able to recover forgotten Apple ID password.
Was this article helpful?